Just About a Perfect Brunch Dish: An Asparagus Frittata!

Asparagus, Leek, and Feta Frittata

Frittatas can be eaten warm or at room temperature, which makes them just about perfect for a meal that might be served in waves or when you have a more than a few brunch dishes to get on the table. They are easy to make “your own” by varying the ingredients, and I find them simpler than quiches (no crust required!). A nonstick pan guarantees a perfect turnout every time.

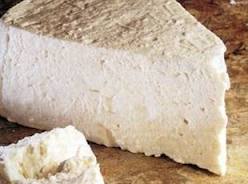
feta cheese

Serves 6 to 8

10 stalks asparagus, thick or woody ends removed

1 large leek, root end trimmed

2 tablespoons unsalted butter

1 teaspoon kosher salt, plus more for seasoning

Freshly ground pepper

10 large eggs

1 cup half-and-half

4 ounces feta cheese, broken into small pieces

Preheat the oven to 350°F.

Remove the top inch of the asparagus tips and split them lengthwise. Cut the remaining stalks crosswise into very thin slices.

Split the leek in half lengthwise and slice the white end and the light green part of the stalk it into half-moon-shaped slices about 1/4 inch thick. (You will have about 11/2 cups.) Put the leek slices in a large bowl of water and swish them around to rinse well, changing the water until it runs clear. Lift from the water with your hands or a slotted spoon and set aside.

Melt the butter in a 10-inch, oven-safe, nonstick sauté pan over medium heat until it begins to bubble. Reduce the heat to medium-low and cook the asparagus and leeks for about 10 minutes, or until the vegetables begin to soften. Season with salt and pepper and spread the vegetables evenly in the pan. Whisk together the eggs, half-and-half, and 1 teaspoon of salt. Season lightly with pepper. Pour into the pan with the asparagus and leeks and sprinkle the feta over the top of the frittata. Cook over medium heat for about 1 minute before transferring the pan to the oven for 20 to 25 minutes, or until set in the center.

Lemon-Ricotta Pancakes For Easter Morning

I love Easter breakfast or brunch and so plan to run two recipes that are perfect for that meal. First are these light, airy lemon-ricotta pancakes. And then, later, I will run my recipe for Asparagus, Leek, and Feta Frittata. Now. The pancakes. You’ll really like ’em! (My son Gray does!)

Lemon-Ricotta Silver Dollar Pancakes


 Gray and pancakes

Lightly kissed with lemon zest and lemon extract, these pancakes are seductively delicate and airy and a welcome change from the expected. A nice change from the usual pancake fare.

Serves 6; makes about 30 pancakes


1 cup all-purpose flour

1/3 cup granulated sugar

21/2 teaspoons baking powder

1/4 teaspoon salt

1 cup ricotta cheese

11/4 cups whole milk

11/2 teaspoons grated lemon zest

3/4 teaspoon lemon extract

2 large eggs, separated

Confectioners’ sugar, for dusting


Whisk together the flour, sugar, baking powder, and salt.

In another bowl, whisk together the ricotta, milk, lemon zest, lemon extract, and egg yolks. Add the dry ingredients and mix well.

In a clean, dry bowl with an electric mixer, beat the egg whites until soft peaks form. Gently fold the beaten egg whites into the ricotta mixture and let the batter rest for 3 minutes.

Lightly spray a griddle or large skillet with vegetable spray and heat it over medium heat.

Drop large tablespoons of batter onto the griddle and cook for 2 to 3 minutes on each side. The pancakes will measure about 3 inches across. To prevent burning, don’t let the griddle get too hot. The pancakes will look slightly dull and a few bubbles will form on the surface when they are ready to flip.

Serve dusted with confectioners’ sugar or keep the pancakes warm in the oven.

A Little Bit About Me

I opened Aux Délices in Riverside, Connecticut, in 1995 with the idea of offering finely crafted specialty foods and freshly baked desserts. My husband Greg and I really like the idea of making people’s lives easier by providing healthful and convenient foods for take-out.

I opened a second location in downtown Greenwich in 2000, followed by the Darien shop in 2004. By 2012, I decided to open a fourth store in Westport. At the Westport location, we have a bistro in the evening. Since I opened the first stores, Greg and I have also established a large, commercial kitchen in Stamford for catering and where we offer adult and children’s cooking classes.

All four shops offer my culinary creations, company-branded prepared foods and a small and carefully selected collection of specialty foods, many produced locally and others imported from France, Spain and Italy.

Before opening Aux Délices, I was executive chef at New York City’s Montrachet Restaurant.  While there, I am proud to say, we maintained a three-star status for seven years. I was the first female chef to be awarded three stars by the New York Times. Pretty cool!

I attended the Culinary Institute of America, where I got my formal training. Greg went to the CIA, too, and before we got together he owned several successful restaurants in California and Connecticut.

I have written four cookbooks: French Food, American Accent, The Summer House Cookbook, Family Kitchen, and, most recently, The Dinnertime Survival Cookbook.

Greg and I live in Greenwich with our three children. And a two dogs.

Chicken and Apricots. Oh My!


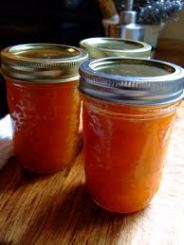
I like bone-in chicken for its good flavor; the bones impart richness not found in boned chicken breasts. And for this dish, the chicken must stand up to an onslaught of flavors from curry powder, turmeric, chili powder, paprika and apricot preserves as well as dried apricots. The result? One of my favorite taste treats!

Image

Spiced Apricot Chicken

This mouth-watering dish is slightly sweet, slightly spicy and totally appealing.

Serves 4

8 pieces bone-in chicken, from 1 (4-pound) chicken cut up, or 8 pieces of chicken purchased already cut up

Kosher salt and freshly ground black pepper

4 tablespoons olive oil

1 large onion, chopped (about 2 cups)

3 garlic cloves, finely chopped

1 tablespoon peeled and grated ginger

1/2 teaspoon turmeric

1 teaspoon curry powder

1 teaspoon chili powder

1/2 teaspoon sweet paprika

1 cup chicken stock, preferably homemade

1/2 cup apricot preserves

1/2 cup chopped dried apricots

1 teaspoon grated orange zest

Juice of 1/2 lemon

2 to 3 tablespoons chopped cilantro, for garnish


If using legs and breasts, cut the breasts in half; separate the thigh from the leg by cutting between the joint. Remove the thigh bone, if preferred. Lightly season the eight pieces of chicken with salt and pepper.

Heat 2 tablespoons of the oil in a heavy skillet over high heat just until smoking.

Working in batches, sear the chicken pieces on all sides, 3 to 4 minutes per side. Do not crowd the pan and reserve the seared chicken on a platter.

When the chicken is seared, pour the remaining 2 tablespoons of oil into the pan and cook the onions and garlic over medium-low heat for 2 to 3 minutes. Stir in the ginger, turmeric, curry, chili powder, and paprika.

Return the seared chicken and any accumulated juices to the skillet. Add the stock and bring to a boil over high heat. Reduce the heat to medium-low, cover, and simmer for about 15 minutes. Adjust the heat up or down to maintain a gentle simmer.

Turn the chicken over, add the apricot preserves, apricots, orange zest, and lemon juice and cook uncovered for about 15 minutes, until the sauce has thickened slightly and the chicken is tender and cooked through. Stir in the cilantro and serve.

Image

Braised Short Ribs for Passover

Braised Short Ribs

If you haven’t tried short ribs at home, don’t wait much longer! I love to make these on a lazy weekend afternoon and they are sure to be welcome at the holiday table. The prep is not difficult and then the ribs and veggies spend a long time in the oven. And you’re free to visit and relax.

shortribs#3

Serves 4

 2 tablespoons canola oil

4 pounds bone-in beef short ribs

Salt and freshly ground black pepper

4 ribs celery, cut into 1-inch-long pieces

2 carrots, cut into 1-inch-long pieces

2 onions, cut into large dice

6 whole garlic cloves

2 tablespoons all-purpose flour

2 tablespoons tomato paste

2 cups red wine

2 cups beef stock, preferably homemade

6 sprigs fresh thyme

2 bay leaves

2 sprigs fresh oregano

1 sprig fresh rosemary

1/4 cup chopped flat-leaf parsley

Preheat the oven to 350°F. Arrange the oven racks so that one is right in the center and there will be enough room for a Dutch oven.

Heat the oil in a large Dutch oven or similar pot over high heat.

Season the short ribs with salt and pepper and sear them, turning several times until browned on all sides. You will have to do this in batches; do not crowd the pot. Transfer the ribs to a plate when they are browned.

Add the celery, carrots, onions, and garlic to the pot and cook over medium-high heat, stirring often. Take care not to let the garlic burn. Add the flour and tomato paste and cook for 1 to 2 minutes longer, stirring constantly.

Add the wine and stock, scraping the bottom of the pot with a wooden spoon to scrape up any browned particles. Bring to a boil and then return the ribs to the pot. Add the thyme, bay leaves, oregano, and rosemary, cover, and transfer to the center rack of the oven.

Braise for about 21/2 hours or until meat is very tender and easily separates from the bone. Remove the meat and bones from the pot and arrange on a serving platter.

Strain the sauce through a colander or large sieve into a large saucepan or bowl, pressing on the vegetables to extract as much liquid as possible. Bring to a boil over medium-high heat, skimming off any fat that accumulates on the surface. Reduce the heat to medium and cook for about 15 minutes or until the sauce is slightly thickened and its flavors intensify. Season to taste with salt and pepper.

Pour the sauce over the ribs, garnish with chopped parsley, and serve.

Cioppino! Began in San Francisco, now Bi-Coastal!

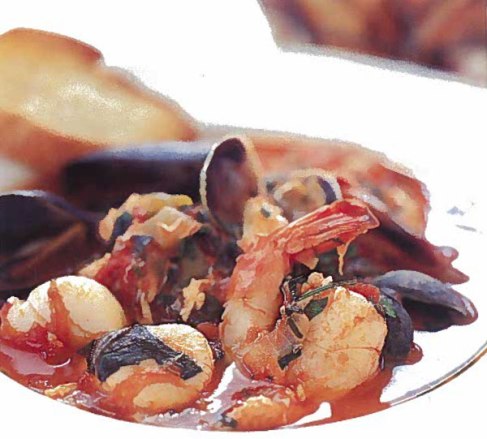
When you make this straightforward one-dish seafood meal, everyone is happy. And best of all, this is great for company. Throw an early spring dinner party! Why not? (p.s. Don’t forget to scroll down for the garlic toasts. Irresistible!)

Image

Cioppino with Garlic Toasts

The long list of ingredients may be off-putting, but once you gather them, this is easy to put together and truly one of the best one-pot meals going. If you like seafood—clams, mussels, shrimp, scallops—as much as I do,  you are in for a treat!

 Serves 6 to 8

¼ cup olive oil

1 medium onion, diced

4 garlic cloves, minced

1 bay leaf

1 teaspoon dried oregano

½ teaspoon red pepper flakes

1 ½ green bell peppers, seeded, ribs removed, and diced

1 small fennel bulb, halved, cored, and diced

2 tablespoons tomato paste

2 cups white wine

4 cups chicken stock or low-sodium broth

One 28-ounce can chopped plum tomatoes with juice

Two 8-ounce bottles clam juice

Salt and freshly ground black pepper

12 to 18 small clams in their shells, well washed

12 to 18 mussels in their shells, well washed

1 pound medium shrimp, peeled and deveined

12 medium sea scallops

8 ounces lump crabmeat, cleaned and picked through for small pieces of shell

¼ cup chopped flat-leaf parsley

3 tablespoons chopped fresh basil leaves

Garlic Toasts (see recipe below)

  1. In a large, heavy pot, heat the oil over medium heat until almost smoking. Add the onion, garlic, bay leaf, oregano, and red pepper flakes. Sauté over medium heat, stirring occasionally, for 5 to 6 minutes, or until the onion begins to soften.
  2. Add the bell peppers and fennel and sauté for 3 to 4 minutes longer. Add the tomato paste, stir for 1 minute, and then add the wine. Bring to a simmer and cook for about 6 minutes, or until almost reduced by half. Add the chicken stock, tomatoes and their juice, and clam juice. Season to taste with salt and pepper. Simmer for 30 minutes.
  3. Add the clams and mussels to the pot and cook, stirring, until their shells open. After 10 minutes, discard any that do not open. Add the shrimp, scallops, and crabmeat and stir for a few minutes or until the shrimp and scallops are cooked through. Discard the bay leaf, stir in the parsley and basil, and adjust the seasoning, if necessary.
  4. Serve the cioppino in large, shallow soup bowls with the garlic toasts on the side.


Garlic Toasts

 Serves 6 to 8

 1 small baguette, about 12 inches long

2 tablespoons unsalted butter, melted

1 garlic clove, finely minced

Salt and freshly ground black pepper

  1. Preheat the broiler.
  2. Slice the baguette into 20 to 24 slices, each about ½ inch thick. Lay the slices in a single layer on a baking sheet.
  3. In a small bowl, stir together the butter and garlic. Brush each slice of bread with the garlic butter and sprinkle with salt and pepper. Broil for 2 to 3 minutes, or until golden brown.

Time for Spring!

Lemon Sole with Creamy Spinach and Mushrooms

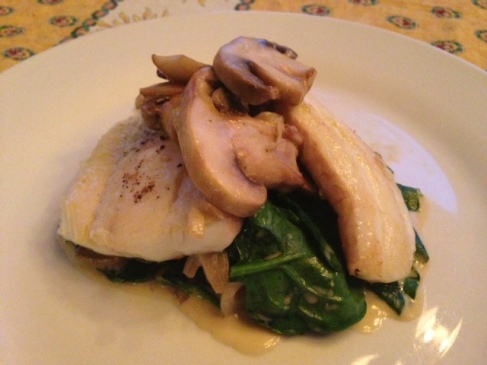
Light, flaky and yet still rich because of the cream, this gets a thumbs up from just about everyone. Even my kids. I love the green, earthy flavors of the spinach and mushrooms with the sole. Perfect for early spring.  If you want to serve this family-style, go for it!

Image

Serves 4

3 tablespoons unsalted butter

8 shallots, thinly sliced

16 small white mushrooms, sliced

1 ¼ cups heavy cream

6 ounces baby spinach leaves

Salt and freshly grounds pepper

Four 6- to 7-ounce lemon sole fillets

2 tablespoons olive oil


  1. In a medium sauté pan, melt the butter over medium heat. Add the shallots and sauté, stirring occasionally, for 4 to 5 minutes, or until they soften. Add the mushrooms and sauté for another 4 to 5 minutes or until they soften. Add the heavy cream, bring to a boil, reduce the heat and simmer gently for about 5 minutes, or until the mixture thickens.
  2. Add the spinach leaves and stir for 1 to 2 minutes, until they begin to wilt. Season to taste with salt and pepper. Cover the pan, remove from the heat, and set aside to keep warm.
  3. Season the sole with salt and pepper. In a large sauté pan, heat 1 tablespoon of the olive oil over medium-high heat until smoking. Reduce the heat to medium, add 2 of the fillets, and cook for 3 to 4 minutes on each side, until lightly browned and cooked through. Remove from the pan and set aside on a warm plate, covered with foil, to keep warm. Add the remaining tablespoon of oil to the pan and let it get hot before cooking the remaining 2 fillets. (If you have 2 large sauté pans, by all means have both pans going at once.)
  4. To serve, spoon the spinach and mushroom mixture onto 4 serving plates. Put a piece of sole on top of the mixture and drizzle any pan juices on top. Serve immediately.

A Family Meal Everyone Loves: Chicken Parm!

chicken parm #1

Chicken Parmesan

Melted cheese oozing into the hot marinara sauce crowns this dish with tempting glory. If you use jarred sauce or have some homemade on hand, this takes minutes from start to oven. Leftovers? If you have any, try a chicken parm sandwich. You’ll love it!

Serves 4

4 boneless, skinless chicken breast halves (5 to 6 ounces each)

Salt and freshly ground black pepper

1 cup all-purpose flour

3 large eggs, lightly beaten

2 cups panko or seasoned dry bread crumbs

1 cup canola oil

1 ½ cups marinara sauce (your favorite brand or homemade), warmed

1 cup grated Provolone cheese

½ cup freshly grated Parmesan cheese

  1. Preheat the oven to 350 degrees F.
  2. Season the chicken breasts on both sides with salt and pepper.
  3. Put the flour in a shallow bowl or on a plate, the beaten eggs in a bowl, and spread the bread crumbs in another shallow bowl or on a plate. Dip each breast first in the flour to coat both sides and then in the eggs to coat. Last, dip the breast in the bread crumbs to coat both sides. As each is coated, set it aside on a plate.
  4. In a large sauté pan, heat the oil over medium-high heat until the oil is very hot. Drop a few bread crumbs in the oil and if they sizzle, the oil is hot enough. Cook the chicken for 2 to 3 minutes on each side, or until golden brown. Lift from the pan with tongs or a wide spatula and transfer to a baking dish large enough to hold them in a single layer. Bake for about 10 minutes or until crispy and cooked through.
  5. Take the pan from the oven and spoon the sauce over the chicken to cover. Sprinkle with the grated cheeses. Return the pan to the oven and bake for 5 to 8 minutes longer or until the cheese melts and the sauce is bubbling. Serve hot.

Going Bananas!

My apologies! Somehow the eggs were overlooked when we transcribed this recipe from my book, The Family Kitchen. (If you happen to own the book, the recipe is on page 78.) I have reinstated them; 2 large eggs. Again, sorry about that!

I know it’s corny, but I had to say it: “going bananas.” Doesn’t just about everyone use that term when they talk about banana bread? It’s easy, fun, delicious, satisfying, kid-friendly, adult-happy—just about everything a quick bread should be. Plus, no need to use the electric mixer, just a wire whisk and a wooden spoon.

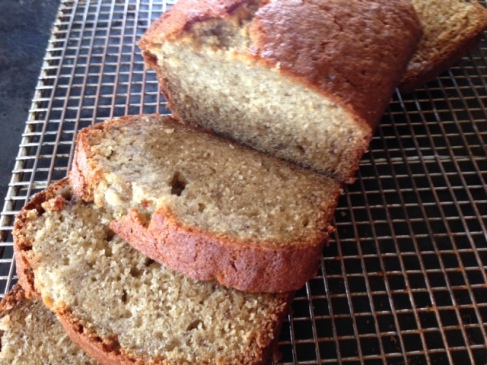
You can bake this with the nuts, or without. Clearly the bread here is without. I had a few very ripe bananas lying around and so made it this weekend, and frankly I am never sorry when I take the time for it. I was lucky to snap the picture before my kids and their friends rushed into the kitchen to devour nearly the whole loaf!

 Image

Banana Nut Bread


Makes one 9-nch loaf


Unsalted butter

½ cup canola oil

1 cup sugar

2 cups mashed bananas, about 3 ripe bananas

2 large eggs, lightly beaten

2 cups all-purpose flour

1 teaspoon baking soda

½ teaspoon baking powder

½ teaspoon salt

½ cup finely chopped walnuts, optional

3 tablespoons milk

1 teaspoon pure vanilla extract


  1. Preheat the oven to 350°F.Grease a 9-by-5-by-3-inch loaf pan with butter.
  2. In a large bowl and using a wire whisk, whisk together the oil and sugar until blended. Add the bananas and eggs and mix well with a wooden spoon.
  3. In a large bowl, combine the flour, baking soda, baking powder and salt. Whisk well with a wire whisk. Gradually add to the banana mixture and stir until incorporated. Do not overmix. There will be some streaks of flour, which is fine.
  4. Stir in the nuts, if using, milk, and vanilla and mix until evenly distributed.
  5. Pour and scrape the batter into the pan and smooth the top. Bake for 60 to 70 minutes, or until a toothpick inserted in the center comes out clean.
  6. Invert the loaf and remove it from the pan. Let the bread cool right side up on a wire rack.


 [from The Family Kitchen]