Strata for Breakfast, Lunch or Dinner

There are days when I am not in the mood for traditional dinner fare and so fill the gap with stratas, frittatas, pancakes and French toast. Why not eat one of these delicious things in the evening?

Greg and I prefer stratas, omelets or fritattas, rather than the pancakes the kids beg for. Add a green salad and the meal is complete.

I am most apt to serve breakfast for dinner on those hectic nights when sports schedules, after-school activities, and late meetings make planning a more typical meal tricky. Guess what? No one objects!

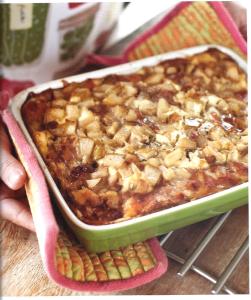
goat cheese strata correct

Goat Cheese, Pear and Proscuitto Strata

A strata as rich and full flavored as this earns its stripes on the dinner table when paired with a crisp arugula or frisee salad and a glass of wine. I especially like it in the fall and winter when pears are in the markets. If you don’t like goat cheese, substitute mozzarella; if you don’t have proscuitto, use ham. This can be assembled early in the day and popped in the oven when you get home. Serve the leftovers the next morning for breakfast, and if you’re looking for something to make for brunch, look no further.

Serves 8 to 10

1 pound sliced white bread (about 12 slices)

2 tablespoons unsalted butter

3 ripe pears, cored and cut into ½-inch dice

8 large eggs

4 cups whole or lowfat milk

1 tablespoon Dijon mustard

1 teaspoon chopped fresh thyme leaves

1 teaspoon kosher salt

Freshly ground black pepper

6 ounces proscuitto, sliced

6 ounces goat cheese, crumbled

Lightly spray a 13-by-9-by-2-inch baking dish with flavorless vegetable spray. Cut the bread into 1-inch cubes and spread nearly half over the bottom of the pan. Reserve the remaining bread cubes.

In a medium sauté pan, heat the butter over medium heat and when it melts and bubbles, add the pears and sauté for 5 to 6 minutes or until they soften and begin to caramelize. Remove from the heat and set aside.

In a mixing bowl, beat together the eggs, milk, mustard, thyme, and salt. Season with pepper.

Spread half of the prosciutto, half the cheese, and half the pears over the bread. Spread the remaining bread cubes over these ingredients and then top evenly with the remaining prosciutto, cheese, and pears.

Pour the egg mixture over the strata and press lightly on the bread to submerge it in the liquid so that it soaks evenly. Cover with plastic wrap and refrigerate for at least 6 hours and up to 12 hours or overnight.

Take the strata from the refrigerator 30 minutes before baking.

Preheat the oven to 350°F. Remove the plastic wrap and bake the strata for 45 to 50 minutes or until the center is set and no longer wobbly. Serve warm.

Canned Vs Dried Beans?

How I Learned to Use Canned Beans

In the interest of passing on some culinary wisdom (!), here are my thoughts about beans. I can’t think of anything more comforting on a cold winter’s day than a thick bean soup. Can you?

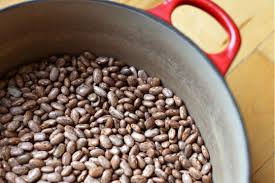
beans in a pot

Time was when I bypassed the cans of cooked beans on the supermarket shelf in favor of packages of dried beans. Hard as pebbles, dried beans require hydrating before they can be cooked, and while this is an easy process, it takes time. Lately I have relaxed and started relying more and more on canned beans.

I still think the texture of beans you soak and cook yourself is slightly better than that of the beans that come from a can, but the difference is slight and in the interest of saving time and making a busy life easier, I use canned beans in most of the recipes in this book.

If you want to soak your own, please do so!  You may have a few sacks of dried beans in the cupboard you want to use up, or you just might prefer to start “from scratch.” If so, figure that 1/2 cup of dried beans (black beans, kidney beans, navy beans, chickpeas) will swell to 11/2 cups after soaking and cooking. This is the equivalent of one 15-ounce can of beans. If you have a one-pound bag of dried beans, they will cook up to equal four 15-ounce cans.

How do you soak beans? Put the dried beans in a large bowl or similar container and cover them with cold water with an inch or two to spare. Let them sit in the water for at least six hours and for as long as overnight. Beans are forgiving and don’t demand a lot of precision at this point.

Once the beans have soaked, at which point they will be visibly plump, drain them and put them in a large pot. Add water or stock (depends on the recipe) to cover by three or four inches (again, the amount will depend on the recipe) and bring to a boil over high heat. Skim any foam that rises to the surface, turn the heat to low, and simmer gently until soft but not mushy. The time depends on the kind of bean but most beans need between 45 and 90 minutes to cook. Lentils, split peas, and black-eyed peas don’t require soaking.

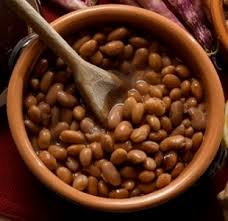
beans in a bowl

Happy New Year! Let’s Celebrate!

Image

Break out the Champagne! Let’s welcome 2015 in style — and toast to an all-around great year. I’m still celebrating my latest book, The Dinnertime Survival Cookbook. Won’t you join me and lift a glass to eating dinner with our families as often as we can in the coming year? Happy 2015!

Very nice things have been said about the book. Thought I would share some with you.

Bobby Flay
“I love when talented chefs show us a little behind-the-scenes glimpse of their family meals. Debra Ponzek is the perfect chef to guide you through the rough-and -tumble chore of feeding your household—no one will want to leave the table.”

Sarabeth Levine, author of Sarabeth’s Bakery
“Creative simplicity is what makes award-winning chef Debra Ponzek’s cooking so delicious and perfect for everyday. This recipe collection will be kept within arm’s reach on my kitchen shelf to enjoy with family and friends for years to come.”

Publishers Weekly
”A charming book full of fresh, inspired, and tasty recipes that is sure to shake up your family’s dinner routine.”

Booklist
“This cookbook from an East Coast restaurant chef turned caterer is simple and sophisticated. Ponzek emphasizes using the best ingredients in straightforward ways, often with enough of a twist to keep things interesting…evening meals for families, couples, and singles don’t have to be something microwaved. Any level of home cook, from novice to professional, can relax and execute these 125 recipes, which are full of goodnesses and local seasonal ingredients

What a Great Idea for This Holiday Week!

Image

Don’t know about you, but this week between Christmas and New Year’s has its own challenges. The kids are home…family and friends are in and out….the house is bursting with sweets and other treats….I feel as though I’ve been cooking one meal after another….but hey! We gotta eat, right?

Let’s keep it simple, healthful, and DE-licious!! How about this “mac and cheese” made with quinoa? Seriously! Try it, you’ll love it and your kids will, too. Mine were skeptical at first but they dug in after the first bite. Go for it!

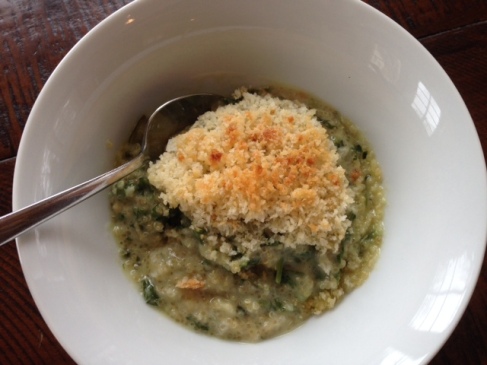
Quinoa and Spinach Mac and Cheese

I know this isn’t real mac and cheese because there’s no mac in sight. Plenty of cheese though, and when it’s mixed with quinoa, this tastes like mac and cheese, feels like mac and cheese, even smells like mac and cheese! And yet, it’s a lot better for you than mac and cheese.

Serves 6 to 8

5 tablespoons unsalted butter

3 tablespoons flour

2 ½ cups whole milk

8 ounces shredded Cheddar cheese

½ teaspoon salt

Pinch of ground nutmeg

3 cups cooked quinoa (from 1 cup raw quinoa according to package directions)

5 ounces baby spinach, coarsely chopped

½ cup grated Parmesan cheese

1/2 cup panko breadcrumbs

  1. Preheat the oven to 375°F. Spray a 3-quart casserole with vegetable oil spray.
  2. In a heavy saucepan, melt 3 tablespoons of the butter over medium heat. Whisk in the flour and cook for about 1 minute. Whisk in the milk and then let the mixture simmer for about 5 minutes until smooth. Remove from the heat and let the sauce cool for 2 to 3 minutes. Add the Cheddar cheese, salt and nutmeg and whisk until smooth.
  3. In a large mixing bowl, mix the cheese sauce with the quinoa. Add the spinach and ¼ cup of the grated Parmesan cheese. Transfer  to the casserole dish.
  4. In a small saucepan, melt the remaining 2 tablespoons of butter. Add the panko and remaining ¼ cup of Parmesan cheese and stir until well mixed and the breadcrumbs are coated with butter. Sprinkle the cheesy crumbs over the top of the mac and cheese.
  5. Bake for about 25 minutes, or until golden brown and bubbly. Allow to sit for 10 to 15 minutes before serving

My Ginger Cake: Perfect for the Holidays!

Ginger is one of the flavors we associate with the winter holidays…warm and rich with an intoxicating aroma. So, here’s my ginger cake, one of my co-writer’s, Mary’s, favorite recipes in the book. Hope you agree with her!

Image

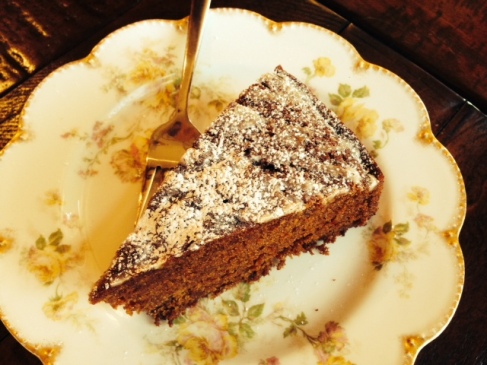
Fresh Ginger Cake

This ordinary-looking cake is deceptive, packed as it is with powerful flavors, particularly the punch of fresh ginger. I bake it all year long, although I particularly like it in the fall when it fills the kitchen with warm, sensual aromas that say “autumn.” And in case you’re wondering about the difference between this and more typical gingerbread, this cake’s ginger and spice quotients are much higher.

Serves 10

6 ounces fresh ginger, peeled

1 cup granulated sugar

1 cup dark black-strap molasses

1 cup canola oil

2 teaspoons baking soda

21/2 cups all-purpose flour

1/2 teaspoon ground cinnamon

1/2 teaspoon ground cloves

2 large eggs, lightly beaten

About 1/2 teaspoon fresh lemon juice

1/4 cup confectioners’ sugar

Preheat the oven to 325°F. Grease a 9-inch round pan that is 3 inches deep and line it with a parchment paper circle cut to fit.

Cut the ginger into medium-size pieces and put in the bowl of a food processor. Add the granulated sugar and pulse until very smooth, like a paste. Mix together the molasses and canola oil.

In a saucepan, bring 1 cup of water to a boil over medium-high heat, add the baking soda, and when dissolved, stir in the molasses mixture.

Whisk together the flour, cinnamon, and cloves and then whisk into the molasses mixture until combined. Add the eggs and mix well.

Pour the batter into the prepared pan and bake for 60 to 65 minutes, or until a toothpick inserted in the middle of the cake comes out dry.

Meanwhile, in a small bowl, drizzle the lemon juice, a few drops at a time, over the confectioners’ sugar, whisking until the glaze is thick and smooth. Set the glaze aside until needed.

Allow the cake to cool in the pan for 10 to15 minutes and then turn out of the pan to cool completely on a wire rack. When cool, drizzle the glaze over the top of the cake and serve.

There’s Always Time to Cook!

I remember plenty of times during this compressed and crazed period between Thanksgiving and Christmas when I finally get home, pulling the car into the driveway with a sense of pleasant relief. Outside, it’s dark and cold and the house is warm and full of my kids and dogs. Greg and I look at each other and we both know what the other is thinking: take-out!

But then my inner cook steps in and I know I will cook. And everyone will be happier for it. The kitchen is bright and cheerful, holding the dark night at bay. I roll up my sleeves, pour a glass of wine and get going. We all hang in the kitchen and eventually (and almost effortlessly), the meal gets on the table.

It’s always better than take out. Slowing down enough to put a home-cooked meal on the table really does make the season bright(er).

Enjoy dinnertime!

Image

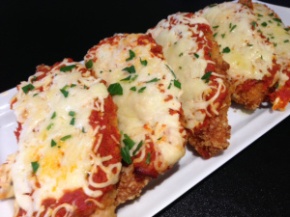
Chicken Parmesan

Melted cheese oozing into the hot marinara sauce crowns this dish with tempting glory. If you use jarred sauce or have some homemade on hand, this takes minutes from start to oven. Leftovers? If you have any, try a chicken parm sandwich. You’ll love it!

Serves 4

4 boneless, skinless chicken breast halves (5 to 6 ounces each)

Salt and freshly ground black pepper

1 cup all-purpose flour

3 large eggs, lightly beaten

2 cups panko or seasoned dry bread crumbs

1 cup canola oil

1 ½ cups marinara sauce (your favorite brand or homemade), warmed

1 cup grated Provolone cheese

½ cup freshly grated Parmesan cheese

  1. Preheat the oven to 350 degrees F.
  2. Season the chicken breasts on both sides with salt and pepper.
  3. Put the flour in a shallow bowl or on a plate, the beaten eggs in a bowl, and spread the bread crumbs in another shallow bowl or on a plate. Dip each breast first in the flour to coat both sides and then in the eggs to coat. Last, dip the breast in the bread crumbs to coat both sides. As each is coated, set it aside on a plate.
  4. In a large sauté pan, heat the oil over medium-high heat until the oil is very hot. Drop a few bread crumbs in the oil and if they sizzle, the oil is hot enough. Cook the chicken for 2 to 3 minutes on each side, or until golden brown. Lift from the pan with tongs or a wide spatula and transfer to a baking dish large enough to hold them in a single layer. Bake for about 10 minutes or until crispy and cooked through.
  5. Take the pan from the oven and spoon the sauce over the chicken to cover. Sprinkle with the grated cheeses. Return the pan to the oven and bake for 5 to 8 minutes longer or until the cheese melts and the sauce is bubbling. Serve hot.

Easy Chicken for Dinner Tonight!

The first three and a half weeks of December are CRA-ZY! We race around to get shopping done, spend hours on the computer, wrap gifts, decorate until our fingers bleed (well, maybe not really….) and even give parties. Makes me tired just writing about it! So how about something pretty darn easy and more-than-delicious for supper tonight?

This chicken recipe is started early in the day and then refrigerated — and forgotten — until time to cook. Perfect for busy, crazy days.

Image

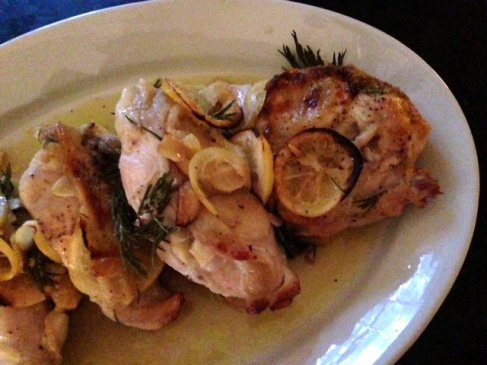
Lemon-Rosemary Chicken Breasts

When it comes to flavor, these chicken breasts are not shy. They literally are stuffed with lemon, garlic, and rosemary, and as they bake, they fill the kitchen with a heady fragrance. For serving, the only thing the breasts need is a good douse of extra-virgin olive oil.

Serves 4

4 split bone-in chicken breast halves with the skin

3 lemons, thinly sliced

12 garlic cloves, thinly sliced

8 sprigs fresh rosemary

3/4 cup olive oil

Kosher salt and freshly ground black pepper

Extra-virgin olive oil, for drizzling

Loosen the skin of each chicken breast by inserting your fingers between the skin and the meat. Slide 2 lemon slices, 1 whole clove of sliced garlic, and 1 sprig of rosemary under the skin of each breast.

Arrange the breasts in a shallow glass, ceramic, or other nonreactive dish and pour the oil over the chicken.

Remove the rosemary leaves from the remaining 4 sprigs of rosemary and scatter the rosemary leaves and remaining lemon and garlic slices over the chicken. Cover the dish and refrigerate for 6 to 8 hours or overnight.

Preheat the oven to 375°F.

Without removing the lemon slices on top of the chicken breasts, transfer the breasts to a clean baking pan. (The lemon slices are delicious once cooked, so you don’t want to  discard them before roasting.) Season lightly with salt and pepper and roast for 25 to 35 minutes, or until the chicken is cooked through. (The time will depend on the size of the breast: they will be 180°F at the thickest part.) Serve hot from the oven, drizzled with a little more olive oil.

Lentil Ragu: Perfect for a wintery night!!

I’m totally into vegetarian cooking these days, although I have not given up on meat. But it’s exciting to discover all sorts of ways to get great flavor from vegetables alone. This ragu is a delicious example of what I’m talking about. You’ll love it spooned over pasta (or rice or even bread). Everyone will love it. What a great weekday supper or weekend lunch!

Image

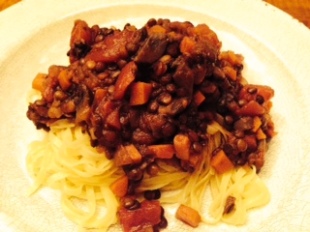
Lentil ragu ladled over pasta

Lentil and Tomato Ragu

Lentils are earthy and filling, a perfect pairing with forest or “wild” mushrooms. Plus, they cook in a mere 45 minutes from sack to dinner plate. No soaking required. I love them for so many reasons and here they are not only paired with gorgeous mushrooms (and you can use plain old white ones if you want), but with tomatoes and just enough red wine to lift the ragu to gastromic heights (the alcohol cooks off while the ragu simmers). Everyone — kids included — loves this robust sauce served over pasta.

Serves 8

3 tablespoons olive oil

3 carrots, peeled and diced

1 medium onion, diced

2 cloves garlic, sliced

10 ounces wild mushrooms, such as oyster, shiitake, or baby portobellos (cremini), diced

1 ½  cups red wine

8 ounces lentils du puy

4 cups vegetable stock, preferably homemade

One 28 -ounce can chopped tomatoes

1 tablespoon tomato paste

1 bay leaf

1 pound spaghetti

About ¼ cup chopped flat-leaf  parsley

½ teaspoon dry oregano

1 ¼ teaspoons salt

Freshly ground black pepper

  1. Heat the olive oil in a large sauté pan over medium-high heat until shimmering. Add the carrots, onions and garlic, reduce the heat to medium, and cook for 4 to 5 minutes or until the vegetables begin to soften. Add the mushrooms and cook for about 3 minutes longer until they begin to soften.
  2. Add the red wine, raise the heat to high, and boil gently for 1 to 2 minutes, stirring occasionally. Add the lentils, stock, chopped tomatoes and their juice, tomato paste and bay leaf. Bring to a boil over high heat, reduce the heat and simmer for about 45 minutes or until the lentils are cooked and the ragu thickens.
  3. Meanwhile, cook the pasta according to the package directions, timing it so that it will be done when the ragu is thickened.
  4. Stir the oregano, chopped parsley and salt into the ragu, and season to taste with pepper. Ladle the ragu over the hot pasta and serve.

My Pie Crust is Really, Really Good. Try It!

Are you making pies for Thanksgiving? Every year I decide not to, but then I start thinking about pie crust…apples and cinnamon…pumpkin….pecans….pears….pie crust (again). Sound familiar?

Seriously, you can buy a very good pie at a local bakery, but will it EVER compare to one you make yourself?

Let’s face it. The answer is no, no, no! Get that? NO! Never!

Homemade is always best. Even if the pie is not picture perfect, it’s delicious. But, you might say, I can’t make pie crust. Well….buy the crust if you must and then fill it with your own glorious mixture of apples and pears, a perfectly seasoned pumpkin pie filling, or caramel-y pecans.

But, if you want to take a stab at your own crust, hooray! Go for it. My crust is really, really good. It’s the result of my formal training meeting my love of home cooking. It’s easy, it’s tender, it’s lovely. So, give it a try

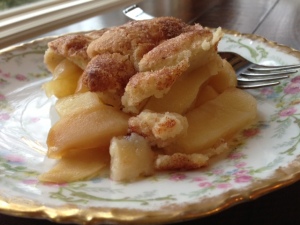
 remy's apple pie

Deb’s Flaky Pie Crust

Don’t be afraid to make your own pie dough; it’s not hard. This is a foolproof recipe that results in a buttery, flaky dough, but of course, if you would rather buy premade pie crust in the supermarket, go for it. Mine tastes better, though!

Makes one 9-inch pie crust

3/4 cup all-purpose flour

1/4 cup cake flour

1 teaspoon baking powder

1/2 teaspoon kosher salt

6 tablespoons cold butter

3 tablespoons ice-cold water

1 teaspoon white wine vinegar

Put the all-purpose flour, cake flour, baking powder, and salt in the bowl of an electric mixer fitted with a paddle attachment. With the mixer on low speed, add the butter, a tablespoon at a time, until the mixture resembles coarse meal. This will take 3 to 4 minutes.

Add the water and vinegar and mix for about 30 seconds longer, or until the dough begins to form a ball. Remove the dough from the mixer, shape it into a disk and wrap it in plastic wrap. Refrigerate for at least 1 hour.

Preheat the oven to 400°F.

On a lightly floured board, roll the chilled dough into a circle with a diameter of 11 to 12 inches. Gently press the dough into a 9-inch pie pan with the sides overhanging the rim. Trim the edges so that the dough is even with the edges of the pan. Lightly spray a piece of foil with vegetable oil spray and lay in on the crust, sprayed side down. Put pie weights or dry beans on top of the foil. This keeps the crust from puffing up during baking.

Bake for 8 to 9 minutes, or until the edges begin to turn golden brown. Remove from the oven and gently lift the foil from the pie pan. Use a fork to prick the bottom and sides of the crust in several places. Return it to the oven for 9 to 10 minutes longer or until light golden brown.

Let the pie crust cool completely set on a wire rack.

This Thanksgiving, Can I …? Answers to Your Questions!

I get asked a lot of questions every year about now. People see me in one of our shops and flag me down…old friends email or text with cooking questions…neighbors stop by asking for advice… family members call from the supermarket or their kitchens. Even the most seasoned home cook has questions; certainly novices do. Here are four of the most commonly asked. Hope my answers help! (And scroll all the way down for a super easy recipe for Brussels sprouts!)

Image

What are a few side dishes that can be made ahead of time?  

On Thanksgiving day, the kitchen can get mighty crowded. And I am not just talking about family and friends wandering in and out — I am talking about bowls, platters, and similar containers of food. This chaos can be controlled if you make a few things ahead of time. Side dishes are perfect for this treatment.

I like a shaved Brussels sprouts salad (see the recipe below). It’s seasonal and a nice, light and crunchy addition to the heavier Thanksgiving fare. You can shave the sprouts, shred the cheese, and mix up the vinaigrette on Wednesday before the meal, or early in the morning. Just before serving, dice the apples and toss them with the sprouts and cheese. Whisk the vinaigrette and drizzle it over the salad, season with s&p, and carry it to the table.

I also like suggest you roast some butternut squash with a little olive oil ahead of time, cube it, and then toss it with arugula, pomegranate seeds and shaved Parmesan just before the meal. Dress the salad with a light vinaigrette. What could be easier?

What is the difference between putting stuffing in the turkey and cooking it in a casserole?

While stuffing traditionally is heated inside the turkey, it’s a better idea to put it into a casserole and heat it alongside the turkey or in a second oven at 350°F. for about 45 minutes or until it reaches a temperature of 170°F. (at which temperature any harmful bacteria have been killed). Be sure to insert an instant read thermometer into the center of the stuffing for the most accurate reading.

You can do the same thing if you choose to stuff the bird. Take the stuffing’s temperature and if it’s not hot enough and yet the turkey is done, scoop it out of the bird and transfer it to a casserole dish. Put this in the oven or even the microwave until it’s 170°F. or hotter. I love the flavor of stuffing cooked in the turkey, but I think it’s better to be safe than sorry.

Is there a way to make the mashed potatoes a little more interesting but still as tempting as ever?

I augment the traditional butter and cream with Greek yogurt and sour cream, or leave out the butter and cream altogether and count on these other dairy products to smooth out the potatoes. To avoid dairy  completely, smash the cooked potatoes with chopped fresh herbs (thyme, rosemary, marjoram) and olive oil. Season with salt and pepper. I also puree roasted fennel or caramelized onions and fold them to the potatoes to give them a subtle flavor boost.

White or Red?

I drink either white or red on Thanksgiving — one of the best things about this meal. But my favorite on turkey day is rosé Champagne!

Shaved Brussels Sprout Salad with Apples and Parmesan

I’ve served this to skeptical adults who swear they “hate Brussels sprouts,” only to witness them dig in with gusto after the first bite. Even kids come back for seconds! Raw salads are extremely popular these days with everyone concerned with their health, and this is one of the best. It takes only minutes to put together. Love it!

Serves 6 to 8

1 teaspoon salt

1/4 cup red wine vinegar

3/4 cup extra-virgin olive oil

Freshly ground black pepper

1 pound Brussels sprouts

2 tart apples, preferably Rome, cored and cut into small dice

2 ounces Parmesan cheese, shredded

In a small bowl, whisk together the salt and vinegar. Slowly whisk in the olive oil until well combined. Season with pepper and set aside.

With a sharp knife, trim the bottoms of the Brussels sprouts. Slice each sprout as thinly as possible, using a sharp knife or a mandolin. Transfer the sprouts to a serving bowl and add the apples and cheese.

Whisk the vinaigrette again to emulsify and toss about ¾ cup of it with the salad. Use more if needed. Taste and adjust the seasonings with salt and pepper, if needed. Serve right away.